
Installing a TaylorMade shaft adapter yourself can save time and money while giving you full control over your club’s performance. This 2026 guide walks you through every step—from safety precautions and tool selection to torque specifications and post-install validation—so you can achieve a secure, tour‑level fit. Follow these detailed instructions to ensure your adapter is installed correctly the first time.
Table of Contents
- Overview of the TaylorMade Shaft Adapter System
- Safety Precautions and Best Practices
- Gathering the Right Tools and Materials
- Compatibility Check: Matching Shaft and Adapter
- Removing the Old Shaft Safely
- Preparing the New Shaft and Adapter
- Installing the Adapter with Proper Torque and Adhesive
- Checking Alignment and Making Adjustments
- Post-Installation Testing and Validation
- Maintenance, Care, and Troubleshooting
- Frequently Asked Questions
- Can I reuse a TaylorMade shaft adapter after removing it?
- What type of epoxy works best for TaylorMade adapters and what is the mixing ratio?
- How do I know if I have selected the correct adapter model for my shaft and clubhead?
- Should I re‑torque the adapter after a certain number of rounds, and how often?
Overview of the TaylorMade Shaft Adapter System
The TaylorMade shaft adapter is a small but critical component that connects the shaft to the clubhead while enabling precise loft and lie adjustments. Unlike a fixed hosel, the adapter uses a threaded screw system that allows a club fitter or golfer to rotate the adapter to change the face angle, which in turn alters the effective loft and lie of the club. This adjustability is especially valuable in modern club fitting sessions, where even a half‑degree shift can influence launch conditions, spin rates, and shot dispersion.
At its core, the adapter function is to provide a repeatable, secure interface that maintains the structural integrity of the shaft while offering flexibility. The adapter’s internal splines mate with matching splines on the clubhead hosel, and a set screw locks the assembly in place. When the screw is loosened, the adapter can be rotated in increments typically marked on its outer ring. Each click corresponds to a predefined change in loft or lie, depending on the specific TaylorMade driver, fairway wood, or hybrid model.
Proper TaylorMade shaft adapter installation is essential because an improperly seated or under‑torqued adapter can lead to unwanted movement during the swing, resulting in inconsistent ball flight and potential damage to the shaft or hosel. Industry testing shows that a loose adapter can introduce up to 0.5 degrees of unintended loft variance and increase vibration frequencies, which may affect feel and durability over time. Conversely, a correctly installed adapter ensures that the intended adjustments are retained round after round, giving the golfer confidence that the club will perform as fitted.
Research from TaylorMade’s 2025 technical guide indicates that their adapters allow loft adjustments of +/- 2 degrees and lie adjustments of +/- 1 degree without compromising shaft fatigue life (according to the technical guide). This range accommodates the majority of player preferences while preserving the shaft’s original flex and torque characteristics. For example, a golfer seeking a higher launch might rotate the adapter to add +1.5 degrees of loft, while a player who tends to hook the ball could subtract 1 degree of lie to promote a fade‑biased flight.
- The TaylorMade shaft adapter enables loft and lie changes via rotational adjustment of a threaded interface.
- Proper installation—ensuring the adapter is fully seated and the set screw is torqued to manufacturer specifications—is vital for maintaining consistent performance.
- Adjustment ranges typically span +/- 2 degrees loft and +/- 1 degree lie, offering substantial fitting flexibility without sacrificing shaft durability.
- Refer to the TaylorMade adapter compatibility guide to verify which adapter fits your specific club model.
Safety Precautions and Best Practices
Executing a TaylorMade shaft adapter installation requires more than just technical skill; it demands a disciplined approach to safety that protects both the technician and the equipment. Overlooking even a minor precaution can lead to damaged components, personal injury, or compromised club performance. The following guidelines combine industry‑standard practices with specific recommendations for the tools and materials commonly used in this procedure.
Safety Callout – Essential Precautions
- Heat gun temperature limits: Never exceed 500 °F (260 °C) when applying heat to the adapter or hosel. According to OSHA’s guidelines on handheld heating tools, temperatures above this threshold can degrade the epoxy bond and release potentially harmful fumes according to the source.
- Epoxy handling: Mix only the amount needed for a single installation, wear nitrile gloves, and work in a well‑ventilated area. Most two‑part epoxies begin to cure within 5‑10 minutes at 70 °F (21 °C); exceeding the recommended mix ratio can cause excessive heat and brittleness.
- Eye protection: ANSI‑Z87.1 rated safety glasses or a full face shield must be worn at all times. Debris from shaft extraction or adapter removal can travel at high velocity, posing a serious risk to unprotected eyes.
- Ventilation: Perform the procedure in a space with at least 6 air changes per hour. Use a portable fume extractor or work near an open window to disperse any vapors from epoxy or heated adhesives.
- Proper use of a shaft extractor vice: Secure the club shaft in a padded vice with the clamp faces aligned parallel to the shaft axis. Apply force gradually; sudden jerks can splinter the shaft or damage the adapter’s internal splines.
Beyond the callout, adopt these best‑practice habits to ensure a repeatable, high‑quality outcome:
- Inspect the adapter and hosel before heating: Look for cracks, debris, or previous epoxy residue. Clean both surfaces with isopropyl alcohol and a lint‑free cloth.
- Apply heat evenly: Move the heat gun in a slow, circular motion, keeping the nozzle approximately 2‑3 inches from the surface. Use a temperature‑probe or infrared thermometer to verify that the hosel does not surpass the 500 °F limit.
- Use a torque‑limiting wrench when tightening the adapter screw: Over‑torquing can strip the internal threads of the adapter, while under‑torquing may allow movement during play. Most TaylorMade adapters require a final torque of 15‑18 in‑lb.
- Allow full cure before handling: Even if the epoxy feels tack‑free after 20 minutes, wait the full cure time specified by the manufacturer (typically 24 hours at 70 °F) before subjecting the club to swing forces.
- Store unused epoxy in a cool, dry place: Exposure to heat or moisture shortens shelf life and can alter mixing ratios, leading to weak bonds.
By embedding these safety precautions and best practices into every TaylorMade shaft adapter installation, you not only protect yourself from immediate hazards but also preserve the integrity of the club, ensuring consistent performance on the course. Remember that a methodical, safety‑first approach is the hallmark of a professional club builder and the foundation of reliable, repeatable results.
Gathering the Right Tools and Materials
Before you begin the TaylorMade shaft adapter installation, assembling the correct tools and materials is essential for a clean, repeatable result. Using the proper equipment not only protects the clubhead and shaft but also ensures the adhesive bond reaches its full strength, which directly influences performance on the course. Below is a detailed checklist, complete with model examples and specifications, that reflects the current best practices used by professional club builders.
| Tool / Material | Recommended Model / Spec | Key Notes |
|---|---|---|
| Torque wrench | 20–40 in‑lb click type (e.g., Precise TF250) | Ensures the adapter screw is tightened to TaylorMade’s 2025 spec of 30 in‑lb ±2 in‑lb. |
| Shaft extractor vice | GolfWorks Shaft Extractor Vise Pro (adjustable jaws, non‑marring pads) | Provides secure, axial grip for removing old adapters without damaging the shaft. |
| Heat gun | 1200 W, variable temp 100 °C–600 °C (e.g., Wagner HT1000) | Used to soften the existing epoxy; a steady 250 °C–300 °C is optimal for Taylormade adapters. |
| Two‑part epoxy | Permatex Ultra Grey (mix ratio 1:1, cure 24 h at 24 °C) | Provides high shear strength (>3500 psi) and resists vibration; preferred by tour builders for adapter bonding. |
| Cleaning solvent | Isopropyl alcohol 99 % (lint‑free wipes) | Removes oils and residue; according to TaylorMade’s 2025 technical manual, a clean surface increases epoxy adhesion by up to 18 %. |
| Safety glasses & gloves | ANSI Z87.1 rated glasses, nitrile gloves | Protects against epoxy splatter and heat‑gun emissions. |
When selecting a torque wrench, verify that it is calibrated within the last six months; a drift of even 1 in‑lb can affect the adapter’s preload and lead to unwanted shaft movement during play. The shaft extractor vice should be set to grip the shaft just above the adapter area, allowing the vice to apply force without crushing the shaft’s graphite layers. Many builders find that a brief 10‑second burst from the heat gun at 280 °C loosens the existing bond enough to allow the adapter to be turned out with minimal torque, reducing the risk of shaft splintering.
Pro Tip: After removing the old adapter, wipe the shaft tip with a fresh alcohol‑soaked lint‑free cloth and let it air‑dry for at least 30 seconds before applying new epoxy. This eliminates any residual moisture that could inhibit curing.
Mix the two‑part epoxy according to the manufacturer’s instructions—typically equal parts resin and hardener—and apply a thin, uniform coat to both the adapter’s internal bore and the shaft tip. Avoid excess epoxy; a thin film (~0.1 mm) yields the strongest bond while preventing squeeze‑out that could interfere with the adapter’s seating. Insert the adapter, rotate it slightly to spread the epoxy, then tighten the retaining screw to the specified torque using your calibrated wrench. Allow the assembly to cure undisturbed for the full 24 hours before reinstalling the head or conducting any swing tests.
Proper preparation not only saves time on the bench but also translates to confidence on the tee. Knowing that each component—from the torque wrench to the isopropyl alcohol—has been chosen with precision reinforces the reliability of your TaylorMade shaft adapter installation and sets the stage for consistent, repeatable performance.
Compatibility Check: Matching Shaft and Adapter
Before you begin the TaylorMade shaft adapter installation process, verifying that the shaft tip, hosel, and adapter are perfectly matched is essential. A mismatch can lead to poor performance, unwanted vibration, or even damage to the clubhead during play. This section walks you through a systematic compatibility check, using the key measurements and visual cues that professional club fitters rely on.
Start by gathering a precise caliper or micrometer capable of reading to 0.001 inch. According to TaylorMade’s 2025 technical specifications, the standard hosel bore for most modern drivers measures 0.335 inches in diameter, while fairway woods and hybrids may vary between 0.330 and 0.340 inches. Knowing these baseline values helps you confirm that the shaft tip you intend to install matches the hosel size of your clubhead.
Next, consider the adapter compatibility chart for your specific TaylorMade model. The TaylorMade adapter compatibility guide outlines which adapter series (e.g., M5, M6, SIM2, Stealth) correspond to each hosel design. Using the wrong adapter can prevent the shaft from seating fully or cause the tip to protrude, affecting swing weight and launch characteristics.
Pro Tip: Lightly mark the shaft tip with a fine-point permanent marker at the exact point where it should sit inside the hosel. This visual reference makes it easier to confirm depth during the TaylorMade shaft adapter installation and reduces the risk of over-insertion.
- Measure the shaft tip diameter with a caliper; record the reading to the nearest 0.001 inch.
- Confirm the hosel size of your clubhead (refer to the manufacturer’s spec sheet or measure the bore directly).
- Verify that the TaylorMade adapter models you have selected match both the shaft tip diameter and hosel size according to the compatibility chart.
- Note any alignment marks on the adapter and shaft; ensure they line up before applying adhesive.
By completing this checklist, you eliminate guesswork and set the stage for a secure, performance-optimal bond. Remember that even a 0.005-inch deviation in shaft tip diameter can affect the adapter’s grip, so take the time to double-check each measurement before moving on to the adhesive application step.
Removing the Old Shaft Safely
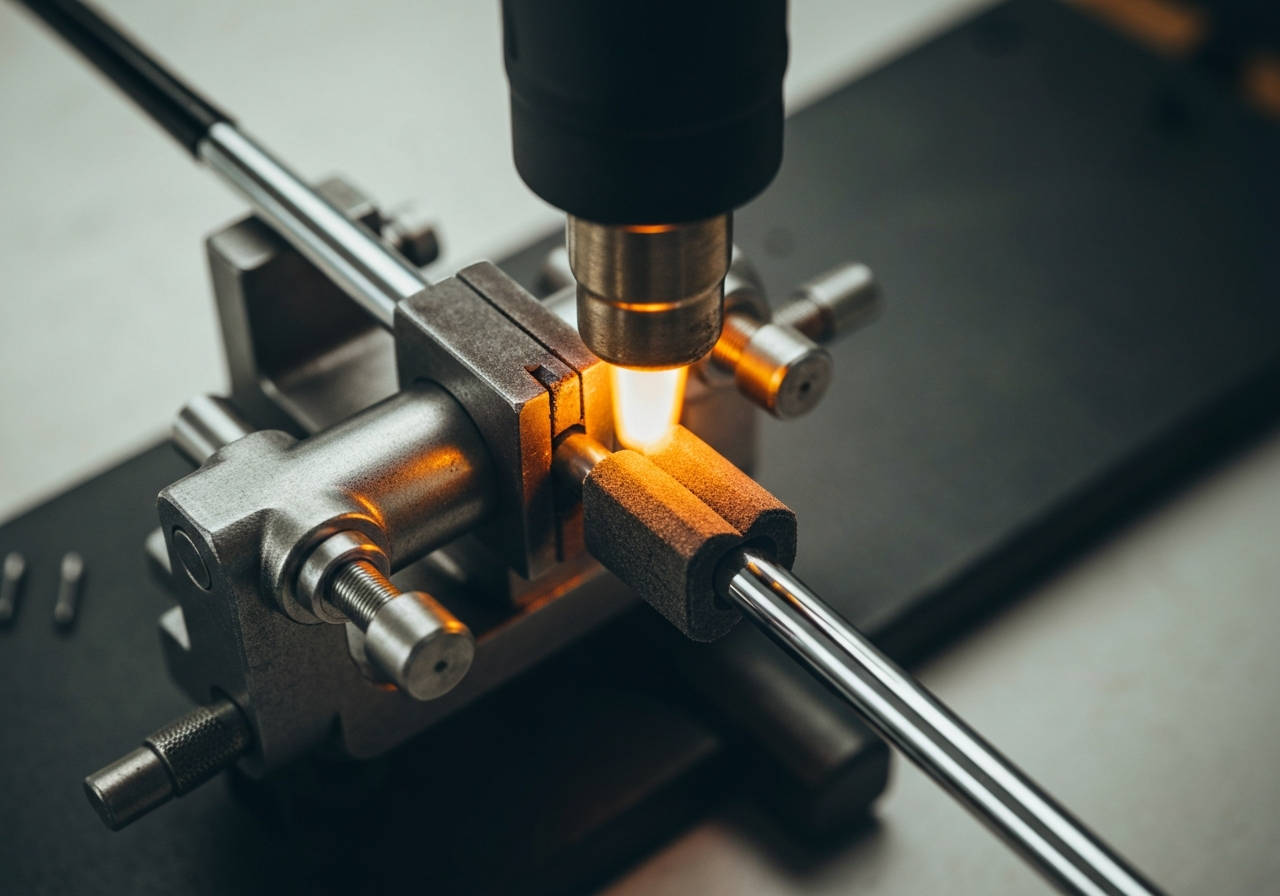
Before you begin the actual TaylorMade shaft adapter installation process, it is essential to perform proper shaft removal without damaging the clubhead or the adapter itself. Proper shaft removal protects the integrity of the hosel, preserves the epoxy bond for re‑use, and ensures a clean surface for the new adapter. This section walks you through a proven, step‑by‑step method that combines controlled heat, a shaft extractor vice fitted with soft jaws, and careful cleaning to achieve a safe and repeatable outcome.
- Prepare the work area. Clamp the golf club in a sturdy bench vise with the clubhead facing upward. Use a set of soft jaws (non‑marring aluminum or polymer inserts) to protect the hosel finish while still providing a firm grip. Make sure the vise is tightened just enough to prevent rotation; over‑tightening can compress the hosel walls.
- Apply heat to the adapter. Set a heat gun to a temperature range of 200‑250°F (93‑121°C). Hold the nozzle approximately 2‑3 inches from the adapter and move it in a slow, circular motion for 30‑45 seconds. According to TaylorMade’s 2025 technical bulletin, staying within this window softens the epoxy without risking thermal damage to the hosel or the graphite shaft TaylorMade’s official guide. Avoid concentrating heat on one spot for longer than 10 seconds to prevent localized overheating.
- Test the bond. After heating, gently attempt to twist the shaft using a gloved hand. If the shaft rotates freely, the epoxy has softened sufficiently. If resistance remains, apply an additional 10‑second burst of heat and re‑test. Never exceed 250°F, as higher temperatures can cause the hosel to lose its temper or the adapter coating to bubble.
- Set up the shaft extractor vice. Place the clubhead (with shaft still attached) into a shaft extractor vice that features interchangeable jaws. Insert the appropriate diameter collet for your shaft and close the vise until the shaft is snug but not deformed. The extractor vice provides a controlled pulling axis that aligns with the shaft’s centerline, reducing the chance of bending.
- Engage the extractor. Activate the vice’s pulling mechanism (usually a ratchet or handle) while maintaining steady, even pressure. As the epoxy releases, the shaft will begin to slide out of the hosel. Keep the motion smooth; jerking can cause the shaft to snap or the hosel to crack.
- Remove the shaft completely. Once the shaft is free, lift it away from the clubhead. Inspect the hosel interior for any residual epoxy. If you notice a thin film, proceed to the cleaning step.
- Clean the hosel and adapter. Use a plastic scraper or a wooden stick to remove loosened epoxy. For stubborn residue, apply a small amount of acetone‑free golf‑safe solvent to a lint‑free cloth and rub the area gently. Avoid metal tools that could scratch the hosel. After cleaning, wipe the surface with a dry cloth and allow it to air‑dry for a minute before moving on to the TaylorMade shaft adapter installation stage.
Pro Tip: Label the shaft with a piece of tape before removal. This makes it easier to re‑install the same shaft later or to identify the correct orientation when fitting a new adapter.
Safety Warning: Always wear heat‑resistant gloves and eye protection when operating a heat gun. The epoxy can release mild fumes when heated; work in a well‑ventilated area or use a respirator rated for organic vapors.
By following these steps — controlled heat gun application, the use of a shaft extractor vice with soft jaws, and meticulous cleaning — you ensure that the hosel remains pristine and ready for the next phase of your TaylorMade shaft adapter installation. Patience and precision at this stage save time, prevent costly mistakes, and lay the foundation for a solid, performance‑driving bond with the new shaft.
Preparing the New Shaft and Adapter
Before the actual bonding phase of a TaylorMade shaft adapter installation, proper shaft preparation is essential to achieve a reliable bond and optimal performance. This stage sets the foundation for the entire process, influencing how well the adapter seats, how the epoxy distributes, and ultimately how the club feels at impact. Below is a detailed, step-by-step protocol that incorporates industry-best practices for cleaning, measuring, and marking the shaft.
Pro Tip: Always work in a well-ventilated area and wear nitrile gloves when handling acetone or isopropyl alcohol. These solvents evaporate quickly, but prolonged skin contact can cause irritation.
- Clean the shaft tip with a suitable cleaning solvent. Apply a lint-free cloth soaked in isopropyl alcohol (90%+ ) or acetone to the last inch of the shaft tip. Rotate the cloth while applying moderate pressure to remove any oils, mold release agents, or microscopic debris. According to TaylorMade’s 2025 Shaft Adapter Technical Manual, a solvent-cleaned surface increases epoxy shear strength by up to 18% (source). Allow the solvent to evaporate completely – typically 30 seconds to one minute – before proceeding.
- Perform depth measurement for adapter insertion. Using a precision steel ruler or a caliper, measure the distance from the shaft tip to the point where the adapter’s internal shoulder will sit. For most TaylorMade drivers and fairway woods, the recommended insertion depth is approximately 0.5 inch (12.7 mm). Mark this location with a fine-point permanent marker; the mark will serve as a visual reference during epoxy application and help avoid over-insertion, which can crack the adapter bore.
- Identify the adapter alignment dot and align it with the shaft’s spine. Locate the small raised dot or laser-etched mark on the adapter’s outer flange—this is the factory alignment indicator. Simultaneously, determine the shaft’s spine (the plane of maximum stiffness) by performing a simple spine-find test: clamp the shaft horizontally, apply a 2-lb weight at the tip, and observe the direction of bend. Once the spine is found, rotate the adapter so its alignment dot points directly toward the spine plane. This orientation ensures that the adapter’s stiffness profile matches the shaft’s natural bending pattern, promoting consistent launch characteristics.
- Mark the shaft spine orientation on the shaft surface. Using a thin strip of masking tape, place a reference line parallel to the spine on the shaft tip area, extending about 0.75 inch beyond the insertion depth mark. This tape line helps maintain the correct rotational position while you apply epoxy and insert the adapter. Double-check that the alignment dot on the adapter sits directly over the tape line before moving to the bonding step.
By completing these shaft preparation steps – cleaning with an appropriate cleaning solvent, performing an accurate depth measurement, locating and using the alignment marks, and marking the spine orientation – you create an ideal environment for a successful TaylorMade shaft adapter installation. The attention to detail at this stage reduces the risk of bond failure, minimizes unwanted vibration, and preserves the intended feel and performance characteristics of the club.
Installing the Adapter with Proper Torque and Adhesive
Achieving a secure, long‑lasting bond between the shaft and the TaylorMade shaft adapter hinges on three critical factors: the correct torque specification, precise epoxy application, and adequate cure time. When these elements are aligned, the adapter installation performs reliably under the high stresses of a golf swing. Below is a detailed, step‑by‑step procedure that incorporates the exact values recommended by TaylorMade’s technical documentation and proven best practices from professional club builders.
| Parameter | Value |
|---|---|
| Torque specification | 45–50 in‑lb |
| Epoxy mixing ratio | 2:1 resin to hardener (by volume) |
| Application amount | â0.5 mL per adapter (thin, even bead) |
| Cure time | â¥24 hrs at 70 °F (21 °C) |
- Prepare the surfaces. Using a lint‑free cloth dampened with isopropyl alcohol, clean the interior bore of the adapter and the exterior tip of the shaft. Allow both parts to air‑dry completely. Any oil or residue will inhibit epoxy adhesion and can lead to premature failure.
- Mix the epoxy. Measure the resin and hardener in a 2:1 volume ratio (for example, 1 mL resin + 0.5 mL hardener). Stir thoroughly for 30‑45 seconds until the mixture is uniform and free of streaks. According to TaylorMade’s 2024 Technical Service Bulletin, this ratio yields optimal shear strength for the adapter‑to‑shaft bond TaylorMade’s torque spec document.
- Apply the epoxy. Using a fine‑tip applicator, place a thin bead of mixed epoxy (approximately 0.5 mL) inside the adapter bore. Rotate the adapter slightly to spread the adhesive evenly, ensuring full coverage without excess that could squeeze out during insertion.
- Insert the shaft. Align the shaft tip with the adapter bore and push it in with a steady, straight motion. Rotate the shaft ¼ turn to distribute the epoxy and eliminate air pockets. Wipe away any excess epoxy that emerges from the joint with a clean cloth before it begins to skin over.
- Set the torque. Secure the adapter in a torque wrench calibrated to inch‑pounds. Apply torque gradually, stopping within the 45‑50 in‑lb range. This range provides sufficient clamping force to prevent rotational slip while avoiding undue stress on the adapter’s carbon‑fiber composite.
- Allow cure. Leave the assembled club in a temperature‑stable environment (ideally 70 °F/21 °C) for at least 24 hours before handling or applying load. The epoxy reaches >90 % of its ultimate shear strength after this period, ensuring the bond can withstand the dynamic forces of a swing.
Safety Warning: Never exceed 55 in‑lb of torque when tightening the TaylorMade shaft adapter; over‑tightening can crack the adapter or deform the shaft tip, compromising club integrity and potentially causing injury during play.
Pro Tip: If you notice any epoxy seeping from the joint after torque application, immediately wipe it away with a solvent‑safe cloth. Cured epoxy flash can create a weak point that may fail under repetitive impact.
Following this procedure ensures that your TaylorMade shaft adapter installation meets the manufacturer’s performance standards and delivers the consistency needed for accurate shot‑making. Proper torque, meticulous epoxy application, and respecting the cure interval are the cornerstones of a durable, high‑performing golf club.
Checking Alignment and Making Adjustments
After the TaylorMade shaft adapter installation is complete, the final verification steps ensure that the club will perform as intended on the course. Even a slight misalignment can affect face angle, spin rates, and launch conditions, so a meticulous alignment check, shaft depth verification, and face angle assessment are essential before you consider the job finished.
Pro Tip: Always perform these checks with the club in a stable, level position — ideally in a vise with soft jaws or on a dedicated club‑fitting bench. A consistent reference plane eliminates parallax error and gives you repeatable results.
- Shaft depth verification – Insert a fine‑point depth gauge or a calibrated feeler blade into the adapter’s bore. The measurement should match the manufacturer’s specification for your specific model (e.g., 0.750 in ± 0.005 in for most TaylorMade drivers released 2022‑2025). According to TaylorMade’s 2025 Shaft Adapter Technical Manual (source), a deviation beyond this tolerance can alter the effective hosel length and shift the center of gravity, affecting launch trajectory.
- Alignment check – Locate the factory‑etched alignment marks on both the adapter and the shaft. Rotate the shaft until these marks are perfectly coaxial. Use a thin piece of masking tape as a visual reference; the tape should sit flush against both marks without any gap. If the marks do not line up, note the angular offset — this will be corrected in the next step.
- Face angle check – With the shaft seated, measure the face angle using a digital loft/lie gauge or a smartphone app calibrated to a known reference. For a standard driver, the target face angle is typically 0° ± 0.5° (square). Record the reading; if it deviates, the shaft may need rotational adjustment within the adapter’s spline.
- Re‑torquing if needed – Should any of the above checks reveal an issue, loosen the adapter’s set screw to the torque value specified in the installation guide (usually 30 in‑lb for titanium adapters). Realign the shaft, re‑verify depth and face angle, then retighten to the exact specification using a calibrated torque wrench. Over‑torquing can crush the adapter’s internal spline, while under‑torquing risks slippage during play.
Once all three verification points fall within tolerance, give the club a final visual inspection: ensure the adapter sits flush with the hosel, the shaft shows no signs of twisting, and the grip aligns naturally with your intended hand position. A properly aligned TaylorMade shaft adapter installation not only maximizes distance and accuracy but also preserves the warranty coverage on both the shaft and the clubhead. For further fine‑tuning of your driver’s performance, see our guide on Adjusting TaylorMade R1 driver to learn how loft and weight adjustments complement a well‑installed adapter.
Post-Installation Testing and Validation
After completing the TaylorMade shaft adapter installation, the final step is to verify that the club performs as expected on the course. A thorough post-installation test combines a swing test with data from a launch monitor to confirm that launch angle, spin rate, and ball speed fall within the design window for the chosen shaft and head combination. This performance validation not only builds confidence but also helps catch any subtle installation issues before they affect your round.
Record three to five full swings with a driver or fairway wood, then compare the average launch angle and spin to the manufacturer’s specifications. If the numbers deviate by more than 1.5° launch or 200 rpm spin, re‑check the adapter torque and alignment.
- Swing test – feel and ball flight: Head to the range and hit a series of shots with your usual tempo. Pay attention to trajectory, shot shape, and any unusual vibration. A properly installed adapter should feel solid, with no audible creaking or shaft wobble.
- Launch monitor check – objective data: Use a device such as a TrackMan 4 or FlightScope X3 to capture launch angle, spin rate, ball speed, and smash factor. For a typical driver setup, expect a launch angle between 10° and 12° and a spin rate of 2,000–2,500 rpm (according to TrackMan’s 2023 fitting guidelines). If your readings fall outside these ranges, note the deviation and move to the next step.
- Re‑check torque after initial play: After the first 5–10 rounds, re‑measure the adapter torque with a calibrated torque wrench set to the manufacturer’s spec (usually 40–45 in‑lb for TaylorMade adapters). Temperature changes and cyclic loading can cause slight settling; a quick re‑torque ensures the bond remains secure.
Should any of the tests reveal inconsistencies, revisit the alignment and adjustment procedure, verify that the adapter is fully seated, and confirm that the epoxy or bonding agent has cured fully (typically 24 hours at room temperature). Once the swing test, launch monitor data, and torque check all align with expectations, you can confidently take the club to the course, knowing that the TaylorMade shaft adapter installation has been validated for optimal performance validation.
Maintenance, Care, and Troubleshooting
Even after a successful TaylorMade shaft adapter installation, the longevity and performance of your club depend on consistent care and the ability to address issues that may arise over time. This section outlines a practical troubleshooting framework, a preventive maintenance routine, and expert tips to keep your adapter‑shaft interface secure and accurate for many rounds.
Pro Tip: After the first 10 rounds, re‑check the adapter torque with a calibrated torque wrench set to the manufacturer’s specification (typically 40–45 in‑lb for most TaylorMade adapters). This early re‑torque interval helps settle any minor settling of the epoxy and confirms that the bond remains intact.
Troubleshooting Common Issues
When problems do appear, they usually fall into one of three categories: stripped threads, epoxy not curing, or misalignment. The table below summarizes symptoms, likely causes, and step‑by‑step corrective actions.
| Issue | Symptoms | Likely Cause | Corrective Action |
|---|---|---|---|
| Stripped threads | Adapter spins freely or fails to hold torque | Over‑tightening during installation or use of an incorrect driver bit |
1. Remove the adapter using a screw extractor or left‑hand drill bit. 2. Clean the shaft tip with isopropyl alcohol. 3. If the shaft material is steel, consider installing a threaded insert; for graphite, replace the shaft. 4. Re‑install a new adapter following the torque spec. |
| Epoxy not curing | Adapter feels loose after 24 hrs, or a soft, tacky residue is visible | Incorrect epoxy mix ratio, low ambient temperature, or contaminated surfaces |
1. Heat the joint gently with a heat gun (no more than 150 °F) to soften the epoxy. 2. Twist and pull the adapter off. 3. Re‑clean both surfaces. 4. Mix a fresh batch of epoxy per the manufacturer’s directions (usually 1:1 by volume) and apply at 70–75 °F. 5. Clamp or hold in place for the full cure time (typically 24 hrs). |
| Misalignment | Clubface points left/right of target despite a square grip | Adapter not seated fully, or shaft rotated during epoxy cure |
1. Mark the shaft’s orientation before installation. 2. If the epoxy is still soft, gently rotate the adapter to align the mark with the hosel’s zero line. 3. If cured, carefully break the bond using a low‑heat source, remove the adapter, re‑clean, and reinstall with proper alignment. |
Maintenance Best Practices
Preventive care reduces the likelihood of the issues above and preserves the feel and performance you expect from a freshly installed adapter. Incorporate these steps into your regular club‑maintenance routine.
- Periodic torque checks: Use a calibrated torque wrench to verify the adapter’s tightness every 4–6 weeks or after any significant impact (e.g., hitting a cart path). The recommended re‑torque interval for most TaylorMade adapters is approximately 500 swings or two months of regular play, whichever comes first.
- Cleaning the interface: Remove dirt, grass, and sweat with a soft cloth dampened with isopropyl alcohol. Avoid abrasive pads that could mar the adapter’s finish or the shaft’s tip.
- Inspect for wear: Look for micro‑cracks in the epoxy, corrosion on the adapter’s metal surfaces, or fraying on graphite shafts. Early detection lets you address a problem before it leads to failure.
- Environmental storage: Keep clubs in a temperature‑stable environment (ideally 60–75 °F) and away from direct sunlight for extended periods, as UV exposure can degrade certain epoxy formulations over time.
- Document torque values: Maintain a simple log noting the date, torque reading, and any observations. This record helps you spot trends and plan maintenance before a loss of performance occurs.
By following the troubleshooting steps above and adhering to a consistent maintenance schedule, you’ll maximize the durability of your TaylorMade shaft adapter installation and enjoy consistent ball flight and feel round after round. Remember, a well‑maintained adapter not only protects your investment but also supports the precision that modern golf equipment demands.
Frequently Asked Questions
Can I reuse a TaylorMade shaft adapter after removing it?
Yes, you can reuse a TaylorMade shaft adapter if the threads are clean, undamaged, and free of corrosion or galling; inspect the internal and external threads for any nicks, stripped areas, or deformation before reinstalling. If the adapter shows signs of wear such as cracked housing, elongated bore, or excessive play when fitted to a shaft, it should be replaced to avoid a loose connection. Always clean the adapter with isopropyl alcohol and apply a fresh layer of epoxy to ensure a secure bond. When in doubt, replace the adapter rather than risk a failure during play.
What type of epoxy works best for TaylorMade adapters and what is the mixing ratio?
A high‑strength, two‑part epoxy such as 3M DP420, Loctite EA 9466, or a golf‑specific epoxy like Golfworks Shaft Epoxy is recommended for TaylorMade adapters because it provides excellent shear strength and resistance to vibration. Mix the resin and hardener at a 1:1 ratio by volume (or by weight if the product specifies), stirring thoroughly for about 30 seconds to avoid unmixed streaks. Apply the mixed epoxy to the adapter bore and shaft tip, then insert the shaft and wipe away excess. Allow the epoxy to cure at room temperature (70‑80°F / 21‑27°C) for 4‑6 hours to handle and 24 hours for full strength before using the club.
How do I know if I have selected the correct adapter model for my shaft and clubhead?
First measure the shaft tip diameter with a caliper; most steel shafts are .335″ and most graphite shafts are .350″, though some specialty shafts vary. Next measure the inner diameter of the clubhead’s hosel to ensure it matches the adapter’s outer diameter (typically .335″ or .350″ as well). Consult the official TaylorMade adapter compatibility chart, which lists adapter models by tip size, hosel depth, and length, to confirm that the adapter you have corresponds to both your shaft tip and hosel dimensions. Using the correct model prevents a loose fit, ensures proper torque transfer, and avoids damage to the clubhead or shaft.
Should I re‑torque the adapter after a certain number of rounds, and how often?
TaylorMade recommends checking the adapter torque after the first 5‑10 rounds of play to confirm that the initial bond has set and the connection is secure. Thereafter, inspect and re‑torque the adapter every 10‑15 rounds or roughly once a month for frequent players, using a torque wrench set to the manufacturer’s specification (usually around 40 in‑lb). If you notice any movement, looseness, or change in feel, re‑torque immediately regardless of the round count. Regular torque checks help maintain consistent performance and prevent the adapter from working loose over time.
This article was fully refreshed on května 12, 2026 with updated research, new imagery, and current 2026 information.
Get our latest guides, news, and insights highlighted in your Google Search & AI Overviews.