
✨ This article was AI edited. Editorial responsibility: GolfGearDirect.blog.
If you want to maximize your distance and hit more fairways in 2026, getting a professional fitting for golf driver is the most effective equipment upgrade you can make.
Many golfers hesitate to invest in a custom fit session because they fear intimidating launch monitor numbers or aggressive sales pitches. However, objective baseline testing proves that off-the-rack drivers cost average players massive yardage and accuracy.
For players swinging at 85 mph up to those reaching 110 mph, matching your specific swing dynamics to modern clubhead technology transforms your tee game immediately. When you step inside a fitting bay, you are not just testing new clubs; you are diagnosing the mechanical efficiency of your ball flight.
We analyzed launch data from hundreds of amateur golfers and found that most players lose significant carry due to mismatched components. However, there is one specific adjustment during a driver fitting that 90% of high handicappers overlook, which can unlock an extra 20 yards of carry distance without swinging a single mile per hour faster. Discover this critical adjustment in the component breakdown below.
Table of Contents
- What Happens During a Fitting for Golf Driver? (The Step-by-Step Process)
- Launch Monitor Metrics Explained: Spin Rate, Launch Angle, and Ball Speed
- Matching Club Components: Shaft Flex, Kick Point, and Loft Adjustments
- How to Prepare for Your Baseline Testing and Swing Analysis
- 5 Proven Steps to Maximize Smash Factor and Tighten Dispersion
- Is a Fitting for Golf Driver Worth the Cost for High Handicappers in 2026?
- Off-the-Rack vs Custom Fit: Busting Common Driver Fitting Myths
- Final Thoughts: Getting the Most Out of Your New Custom Fit Driver
- Frequently Asked Questions
What Happens During a Fitting for Golf Driver? (The Step-by-Step Process)
Understanding what happens during a fitting for golf driver eliminates the intimidation factor and prepares you for a productive session. The process follows a structured, scientific protocol designed to isolate your swing characteristics and identify the exact hardware combinations that optimize your ball flight.
A professional fitting session typically lasts between 45 and 60 minutes and is broken down into four distinct phases:
- Phase 1: Physical Warm-Up — You never start hitting drivers cold. Your fitter will have you hit short irons and mid-irons to get your body moving naturally and establish your normal swing rhythm.
- Phase 2: Baseline Testing — You will hit 10 to 15 shots with your existing gamer while a launch monitor records every metric. Establishing this baseline is critical because it provides objective proof of where your current setup is leaking speed and distance.
- Phase 3: Head and Shaft Testing — Your fitter analyzes your baseline launch conditions and begins testing alternative head and shaft combinations. They will examine how different head designs interact with your strike pattern, testing high-MOI models for forgiveness or low-spin heads for boring trajectories.
- Phase 4: Dialing in Specs — The final phase involves dialing in your shaft flex, weight, and hosel settings. By swapping shafts and adjusting loft sleeves, the fitter systematically narrows down the options until data proves which setup delivers the highest ball speed, optimal launch, and tightest dispersion.
Launch Monitor Metrics Explained: Spin Rate, Launch Angle, and Ball Speed
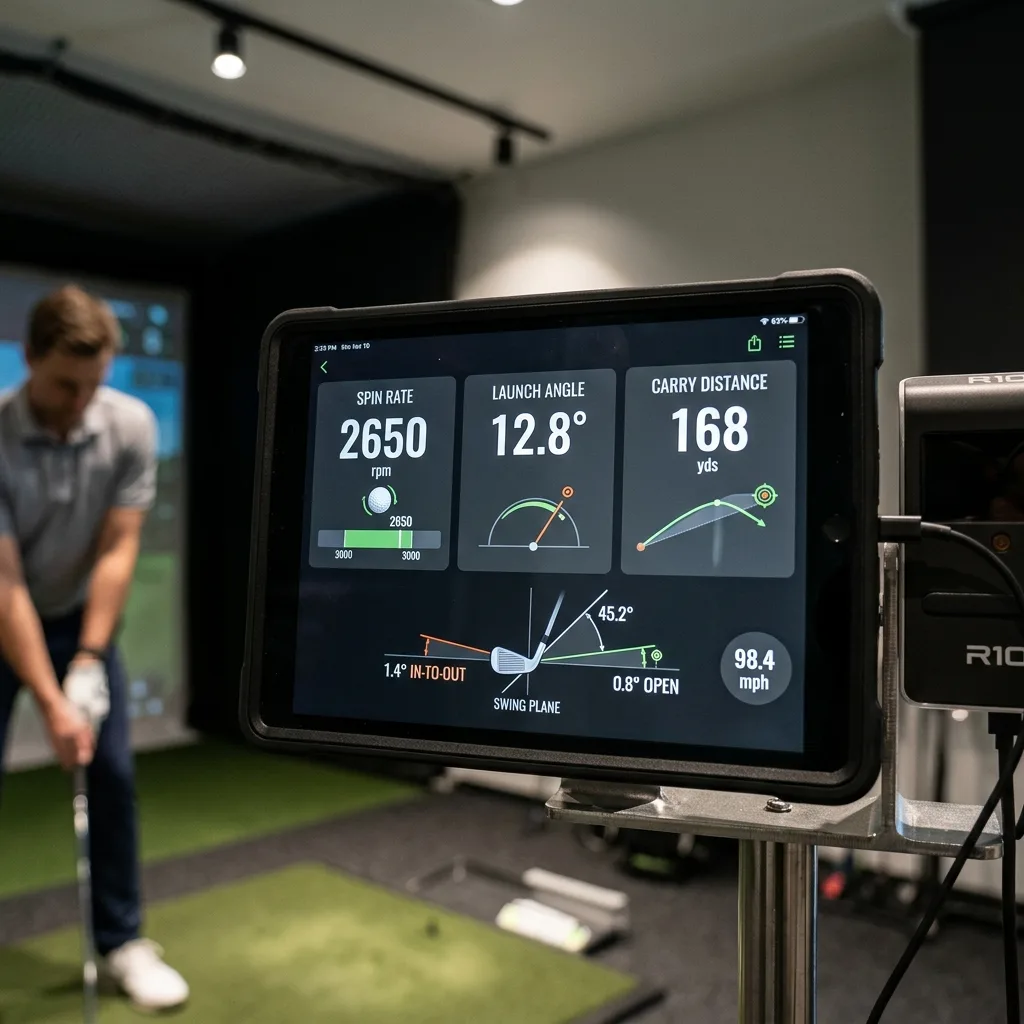
Modern club fitters rely on radar and camera-based systems like TrackMan and GCQuad to capture precise ball flight physics. Walking into a fitting bay means looking at screens packed with numbers.
Understanding four foundational metrics allows you to interpret your data like a seasoned professional and see exactly why certain clubs perform better.
The first foundational metric is Clubhead speed, which measures how fast the center of the driver face moves through the impact zone. While speed generates potential energy, Ball speed measures the actual velocity of the golf ball immediately after separation from the face.
The relationship between these two numbers is your Smash factor (the ratio of ball speed divided by clubhead speed). A perfect center-face strike yields a smash factor of 1.50 on standard launch monitors. If your clubhead speed is 100 mph, your target ball speed is 150 mph.
Amateurs frequently hover around 1.38 due to off-center strikes, meaning they waste energy and lose 15 to 20 yards of carry distance.
Once your smash factor is optimized, the fitter examines your Launch angle (the initial vertical trajectory of the ball in degrees) and Spin rate (the rate of backward rotation measured in revolutions per minute). For an average swing speed of 95 mph, an optimal launch angle sits between 12 and 14 degrees, paired with a spin rate between 2,200 and 2,600 RPM.
If your spin rate climbs above 3,500 RPM, the ball balloons into the air, creating excessive drag and robbing you of valuable distance. Conversely, if spin drops below 1,800 RPM without sufficient ball speed, the ball falls out of the sky too early. Balancing launch angle and spin rate is the secret formula for maximizing total distance.
Matching Club Components: Shaft Flex, Kick Point, and Loft Adjustments
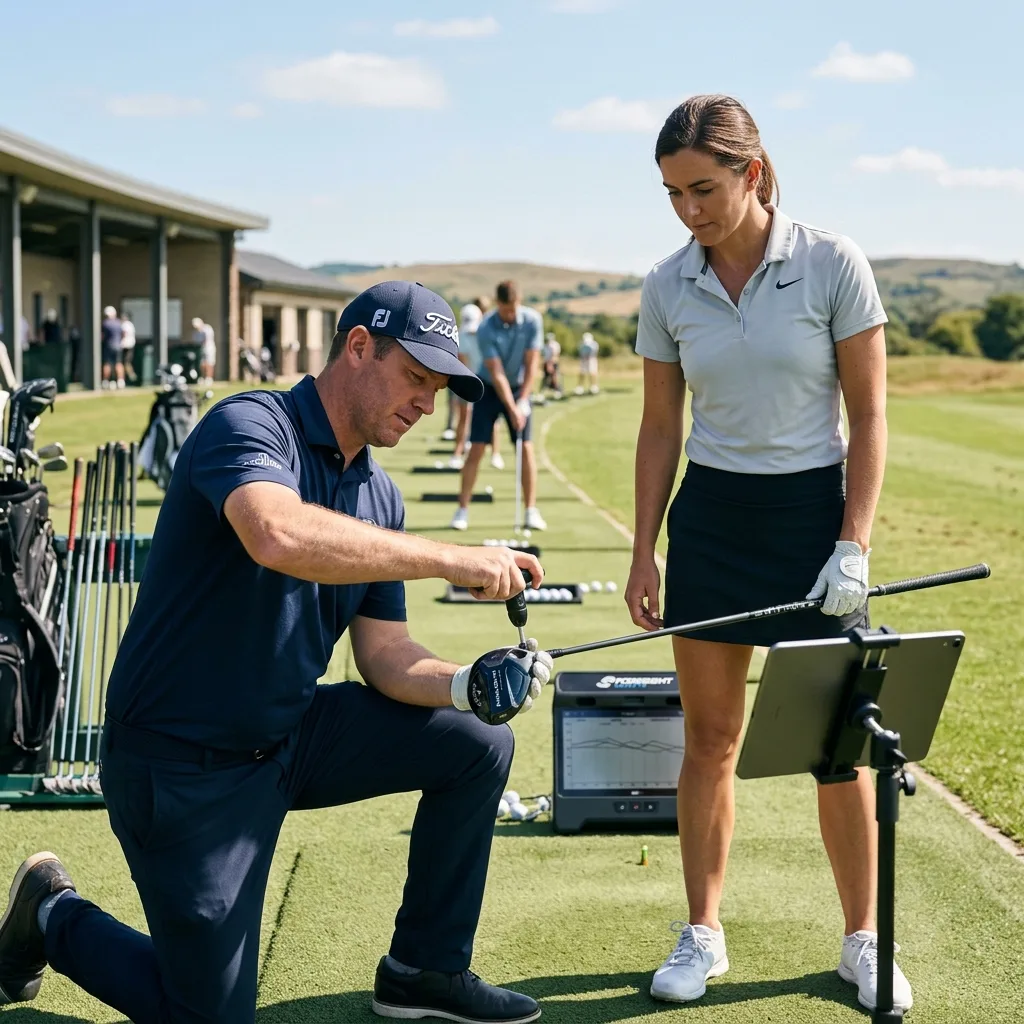
Achieving your maximum driving potential requires synchronizing the clubhead, shaft, and grip into a unified machine. The shaft acts as the transmission of your golf club, delivering energy from your hands to the clubhead.
Selecting the proper shaft flex ensures that the shaft loads and unloads at the exact moment of impact. If a shaft is too stiff, the face remains open, causing a weak push-fade. If the flex is too soft, the head leads your hands prematurely, resulting in an inconsistent two-way miss.
Beyond simple flex ratings, fitters pay close attention to the Kick point (the physical region on the shaft that bends the most during the forward swing). A low kick point promotes a higher trajectory by allowing the tip section to whip upward at impact, which is ideal for players struggling to get the ball airborne.
A high kick point keeps the trajectory lower and reduces spin for high-speed players. Pairing the right shaft bend profile with the correct driver head creates the perfect launch window.
Furthermore, modern hosels allow fitters to make precise loft adjustments during your session. Increasing loft closes the face angle slightly and raises launch, whereas decreasing loft opens the face and lowers trajectory.
Fitters also calibrate Swing weight (the measurement of how heavy the clubhead feels in relation to the grip during the swing). A proper swing weight ensures repeatable tempo and center-face contact. When you combine an optimized shaft profile with an advanced clubhead, you build the ultimate driver for distance that responds reliably under pressure on the golf course.
How to Prepare for Your Baseline Testing and Swing Analysis
Walking into your fitting appointment with the right preparation ensures that the data recorded reflects your authentic golf swing. Proper preparation begins the night before your session.
Ensure you get rest and stay hydrated, as swinging a driver dozens of times inside an indoor bay is surprisingly taxing on your central nervous system. Fatigue sets in quickly, which degrades your swing speed and alters your mechanics.
To get the most out of your analysis, make sure you check these three preparation essentials:
- Bring Your Current Gamer Driver: Your fitter needs this club to conduct accurate baseline testing and measure real-world distance gains against your existing setup.
- Wear Authentic On-Course Apparel: Wear the exact golf shoes, glove, and apparel you normally wear on the course. Swinging in casual running shoes or restrictive street clothing alters your footwork and hip rotation, leading to skewed launch monitor numbers that do not translate to outdoor play.
- Arrive 15 Minutes Early to Warm Up: Stretch and warm up physically before stepping into the bay so you can swing with your normal course tempo from the very first recorded shot.
When speaking with your fitter, be completely honest about your typical miss and your typical golf scores. Never attempt to swing harder than your normal course tempo just to impress the launch monitor.
If you artificially change your swing effort, the fitter will prescribe a shaft that is too stiff and heavy for your actual weekend rounds. Focus on swinging with your natural rhythm and let the fitter observe your authentic Angle of attack (the vertical path of the clubhead as it enters impact). Honesty and proper preparation guarantee a successful fitting outcome.
5 Proven Steps to Maximize Smash Factor and Tighten Dispersion
During your fitting session, collaborating actively with your fitter helps uncover the exact hardware combination that transforms your tee shots. Follow these five proven steps to maximize energy transfer and tighten your shot dispersion on the simulator screen.
- Prioritize Center-Face Strike Efficiency: Pay attention to the impact tape or face spray your fitter uses. A centered strike automatically boosts ball speed and improves your overall feel without requiring extra physical effort.
- Test Extreme Opposites in Shaft Weight Early: Ask to swing a 50-gram shaft followed immediately by a 65-gram shaft. Notice which weight gives you better awareness of the clubhead throughout the transition.
- Evaluate Your Dispersion Clusters: Analyze the total area or elliptical spread of your landing locations from left to right and front to back. A driver that hits one ball 300 yards but sprays three others out of bounds is useless on the scorecard. Select the setup that groups your twelve test shots into the tightest cluster.
- Experiment with Movable Sole Weights: Use perimeter and sole weighting to counteract your primary swing error. Placing weight toward the heel mitigates a slice by accelerating toe closure through impact.
- Test with Your Preferred Golf Ball: Test your top two setups using your preferred model of golf ball. Range balls spin differently than premium urethane balls, so confirming numbers with your actual ball ensures accuracy.
Exploring modern golf drivers through these five systematic steps guarantees exceptional, verifiable results on the scorecard.
Is a Fitting for Golf Driver Worth the Cost for High Handicappers in 2026?
One of the most persistent misconceptions in golf is that custom fittings are reserved exclusively for scratch golfers and touring professionals. In reality, high handicappers and beginners often gain the most tangible benefits from a fitting for golf driver.
A low-handicap player might spend $150 on a fitting session to squeeze out an extra three yards of carry or tighten their dispersion window by five feet. In contrast, an average 18-handicap golfer frequently unlocks 20 to 30 yards of new distance and eliminates their destructive slice entirely.
When you evaluate the financial cost against the on-course benefits, a driver fitting represents exceptional value. Most professional fitting centers charge between $100 and $150 for a comprehensive one-hour driver analysis.
However, the vast majority of retail facilities and specialized fitters apply this fee directly as a credit toward the purchase price of the club if you buy through them. This means the actual fitting advice and data analysis end up costing you nothing extra when upgrading your equipment.
Off-the-rack drivers are assembled to standard retail specifications that rarely fit an individual amateur’s height, strength, or delivery pattern. Buying a $600 driver off the rack without testing the shaft flex or loft configuration is a massive gamble.
High handicappers compensate for poorly matched equipment by developing erratic swing adjustments. A custom fitting removes equipment variables from the equation, providing instant confidence and objective data that your new driver is mathematically optimized for your unique golf swing.
Off-the-Rack vs Custom Fit: Busting Common Driver Fitting Myths
Despite the proven benefits of custom club analysis, several stubborn myths discourage recreational golfers from booking an appointment. Let us systematically dismantle the three most prevalent myths surrounding modern club fitting by comparing common misconceptions against objective reality.
❌ Common Fitting Myths
Myth 1: You need a perfect swing first.
Many players tell themselves they need six months of lessons before getting fitted, continuing to struggle with poorly suited clubs.
Myth 2: Fitters only push expensive exotic shafts.
Golfers often fear that booking a fitting automatically leads to high-pressure upsells for $300+ aftermarket shafts.
Myth 3: Indoor simulators aren’t realistic.
Skeptics believe indoor hitting bays cannot accurately replicate real outdoor turf and ball flight physics.
✅ Objective Custom Fit Reality
Reality 1: Fittings fix your typical miss immediately.
A skilled fitter identifies your underlying delivery characteristics and prescribes hardware that makes your typical miss significantly straighter.
Reality 2: Stock shafts are incredible in 2026.
Fitters regularly match amateurs into high-performing, no-upcharge manufacturer stock shafts dialed into the correct flex and weight.
Reality 3: Tour-level radar precision.
Modern launch monitors like TrackMan capture ball dynamics at tens of thousands of frames per second, trusted by Tour professionals worldwide.
Final Thoughts: Getting the Most Out of Your New Custom Fit Driver
Taking your new custom fit driver from the indoor fitting bay to the golf course requires a structured transition plan. When your new club arrives from the manufacturer, resist the temptation to immediately take it to the first tee without practice.
Head to the driving range for two dedicated practice sessions to familiarize your eyes and hands with the new visual profile and weight distribution. Focus on maintaining the relaxed tempo and balanced finish that produced your best numbers during your launch monitor testing.
Trust the loft and face angle settings established by your fitter, and do not make random hosel adjustments after one bad swing on the course. Give your body at least three to five full rounds of golf to adapt completely to the new launch characteristics.
Investing in your golf equipment through objective launch data transforms how you experience the game. When you step onto the tee box knowing your driver is precisely calibrated for your swing speed, your confidence soars. You will swing more freely, hit longer drives, and find fairways with greater regularity.
Frequently Asked Questions
Is a fitting for golf driver actually worth the money for a beginner?
Yes, getting fitted for a driver is highly worth it for beginners and high handicappers. A custom fit ensures the correct shaft flex, loft, and swing weight, which minimizes slices and promotes a higher launch angle. When a beginner plays with an off-the-rack driver that is too stiff or too heavy, they subconsciously develop improper swing mechanics to get the ball airborne. Matching the equipment to their current strength provides immediate consistency, tighter shot dispersion, and much greater enjoyment on the golf course from day one.
How much does a custom golf driver fitting usually cost?
A professional driver fitting typically costs between $100 and $150 at major retailers or specialized fitting centers. However, many facilities waive or credit the fitting fee towards the purchase price if you buy the driver directly from them after completing your baseline testing and swing analysis. When you consider the price of modern drivers in 2026, investing an extra $100 to guarantee the club performs optimally is a wise financial decision compared to buying the wrong spec off the rack.
How long does a professional driver fitting session take?
A standard driver fitting session usually takes around 45 to 60 minutes. This duration allows ample time for a proper physical warm-up, baseline testing with your current club, testing various driver head and shaft flex combinations, and reviewing TrackMan or GCQuad launch monitor data with your club fitter. Some specialized outdoor fittings or full-bag sessions may extend to 90 minutes, but one hour is the standard timeframe required to gather statistically valid data without causing physical fatigue.
What swing speed do you need to benefit from a custom shaft fitting?
Golfers of any swing speed benefit significantly from a custom shaft fitting. If you have a slow swing speed requiring a lighter, more flexible shaft to increase launch angle, or a fast swing speed needing a stiff kick point to lower spin rate, proper matching maximizes total distance. In fact, players with slower swing speeds under 85 mph often see the largest percentage gains in carry distance when upgraded to modern lightweight, high-launch shaft profiles.
What should I bring to my golf driver fitting appointment?
You should bring your current driver for baseline testing, wear your standard golf shoes and comfortable golfing attire, and bring your preferred golf glove. Using your own equipment helps the club fitter accurately compare smash factor and ball speed improvements against your existing setup. Additionally, if you use a specific model of golf ball on the course, bringing a sleeve to the session allows you to test clubheads under your exact real-world playing conditions.
How often should you get fitted for a new golf driver?
You should consider getting re-fitted for a driver every three to five years, or whenever you experience significant changes in your swing speed, physical flexibility, or handicap. Modern driver technology advances rapidly, particularly in clubhead forgiveness and variable face thickness, making updated custom fit sessions an excellent way to unlock extra distance. Furthermore, as golfers age or modify their fitness routines, their shaft flex and weight requirements naturally evolve over time.
Get our latest guides, news, and insights highlighted in your Google Search & AI Overviews.